
Strong presentation skills are now a core business competency—use them to improve funding success, win larger accounts, and accelerate career growth. This article focuses on practical, evidence-backed presentation techniques you can apply this week to get better results.
Communication ranks among the top in-demand workplace skills—LinkedIn’s Workplace Learning reports list communication and presentation-related abilities as consistently high priorities for employers (source: LinkedIn Learning workplace learning report).
This guide delivers actionable advice on audience-focused messaging, slide design, and delivery techniques so your presentations drive clear outcomes. Pick one of the three techniques below to practice this week and measure the change in audience reaction or follow-up results.
Understanding the Essentials of a Business Presentation
A presentation is a strategic communication tool: it exists to change what an audience thinks, feels, or does. Start with three clear anchors—one-line message, audience reality, and the action you want them to take.
Message • Audience • Outcome
Keep these diagnostics short and practical:
- Message: One sentence that states the single point people must remember.
- Audience: One-line profile (knowledge level, decision power, top concern).
- Outcome: The specific action or decision you want by the end of the presentation.
Before you create any slides, complete this 30-second audience brief: Who are they, what do they already know, and what metric will show they acted on your message?
Defining Key Components
Every successful presentation depends on a clear purpose, a tight structure, and measurable objectives. Use the rule of three for main points and link each point directly to the audience’s priorities so your content drives real outcomes.
Identifying Audience Needs
Move from performer-centric to audience-centric thinking by asking, “What does my audience need to hear from me?” Translate technical claims into their terms and remove jargon that creates friction.
Adapting Language and Tone
Match vocabulary and depth to the room: novices need simple framing; experts need concise data and nuance. Short, concrete sentences beat long, abstract paragraphs for comprehension.
Providing Relevant Examples and Data
Numbers matter only with context. Research shows connecting new content to prior knowledge improves understanding (see Mayer on multimedia learning). Translate stats into familiar comparisons for your audience rather than leaving raw figures alone.
| Effective Language | Ineffective Language | Impact on Audience | ||
| Industry-specific terms | Unnecessary jargon | Builds credibility and rapport |
| Translated data with context | Raw numbers alone | Enables understanding and recall |
| Tailored, specific examples | Generic, one-size-fits-all stories | Creates emotional connection |
CTA: Before you write your next slide deck, complete the three-line audience brief above and draft a one-sentence message—use that sentence as the spine of your structure.
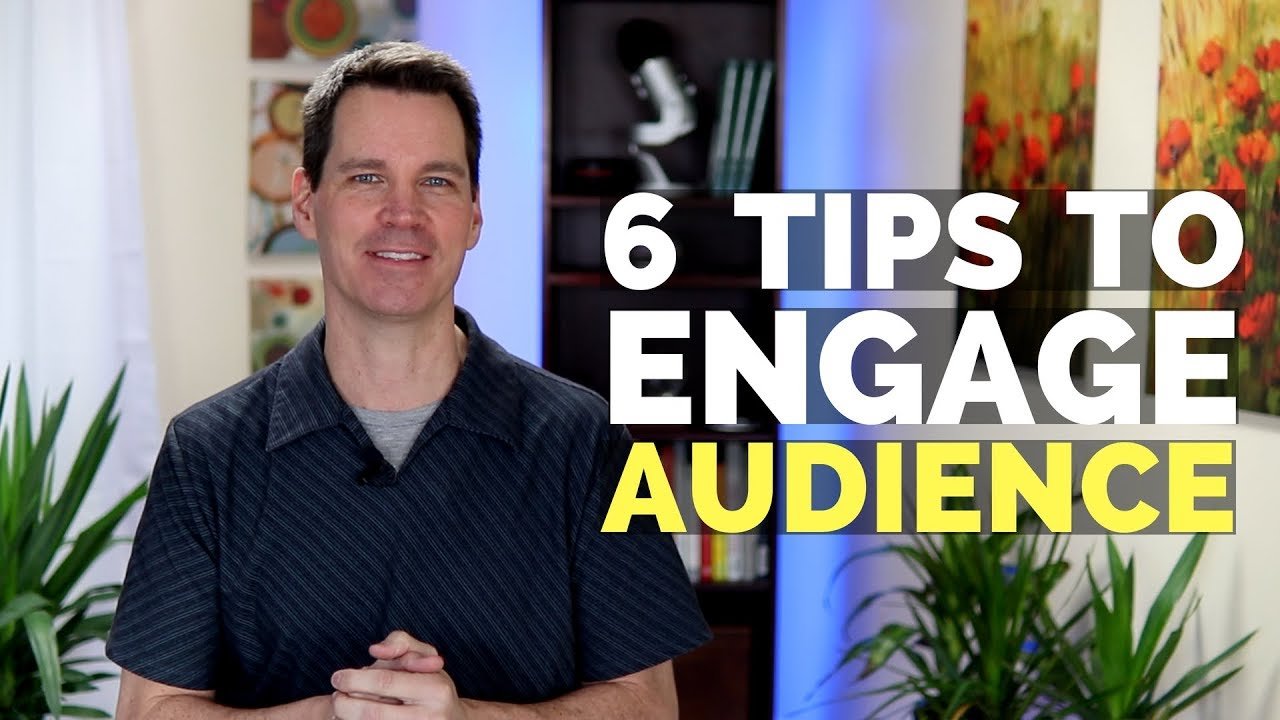
Business Presentation Tips: Engaging Your Audience
Genuine audience engagement is the difference between a talk people forget and one that drives action. Focus on simple, repeatable techniques that create human connection before you worry about perfect slides.
Maintaining Eye Contact and Using Gestures
Make eye contact matter: pick one interested person to steady yourself, then sweep your gaze to other sections every 8–12 seconds so the whole room feels included. In large rooms, look at small groups rather than individual seats to create a sense of connection.
Use purposeful gestures that match your words—open palms for transparency, measured hand movements to enumerate points. Avoid defensive postures (crossed arms, hands in pockets) which reduce perceived trust.
| Effective Technique | Ineffective Approach | Impact on Engagement | ||
| Sustained eye contact (group sweeps) | Reading from notes | Builds trust and connection |
| Open palm gestures | Crossed arms | Signals confidence and openness |
| Purposeful movement (short walks) | Static behind podium | Maintains audience attention |
Storytelling and Personal Connection
Stories anchor abstract ideas. Start with a 30–45 second anecdote that ties directly to your one-line message and ends with a clear takeaway the audience can act on. Audiences recall emotionally framed points better—cite stories briefly, then link them to evidence or a one-line metric.
Keep facial expressions open and aligned with the story’s tone to create psychological safety for listeners (source on engagement).
Incorporating Questions and Polls
Ask an early poll. A single, simple poll within the first five minutes converts listeners into participants and raises attention levels. Example poll template (1 minute): “Which of these is your top priority this quarter? A) Cost B) Speed C) Quality” — display results live and reference them in your second slide.
Use rhetorical questions to guide thought, and open questions sparingly to solicit brief input without derailing flow. Always avoid questions that might embarrass respondents.
Using Anecdotes and Real-Life Examples
Concrete examples make proposals believable. Replace vague claims with a concise case: name the context, the change made, and the measurable result. (If you cite a figure, verify its source before presenting.)
For virtual sessions, apply a 10-minute engagement rule: add a chat prompt or a one-question poll every ten minutes and call out responses by name to keep attention high.
Fact: interactive polling and live questions measurably increase perceived relevance in meetings (see Slido event summaries for engagement benchmarks).
Developing an Effective Presentation Structure
Structure is the backbone of any presentation: it helps your audience follow your ideas and remember the actions you want them to take. Research on multimedia learning shows that coherent organization and simple visuals improve comprehension and retention (see Mayer, 2009).
Crafting a Compelling Introduction
Your opening should do three things in the first 90–120 seconds: grab attention, establish credibility, and preview the roadmap. Start with a provocative question or a brief, relevant story that ties directly to your one-line message.
Template for a tight intro: 1) 15–30 second hook (stat or anecdote), 2) one-line credibility statement, 3) 10-second roadmap (“I’ll cover three points…”).
Organizing Main Points Clearly
Use the rule of three: audiences retain three main points far more reliably than longer lists. Structure each main point with two supporting bullets—one piece of evidence and one clear implication for the audience.
- Point 1 — Key idea (evidence; audience implication)
- Point 2 — Key idea (evidence; audience implication)
- Point 3 — Key idea (evidence; audience implication)
For persuasive scenarios, apply Problem → Solution → Benefit: state the problem, present a focused solution, then spell out the benefit in audience terms.
Practical recovery tip: if you lose your place, repeat the last main point headline and move to the next—your structure will bring listeners back with you.
Further reading: strategies for effective communication.
Creating Impactful Visuals and Slide Designs
Your slides should support your voice, not replace it. Mayer’s principles favor simple, relevant visuals paired with concise narration—this reduces cognitive overload and improves takeaway clarity.

Choosing the Right Visual Aids
Combine media types intentionally: short videos for motion-dependent demos, whiteboards for live diagrams, and single-image slides to underscore emotional points. Keep video clips under 90 seconds when possible and ensure they directly advance your argument.
Slide rules to use and test in the venue: use 32pt or larger for headers in medium rooms (adjust as needed), limit text to three short lines or bullet points, and prefer high-contrast, simple charts over dense tables.
Slide Template (quick)
Title (one line) — Visual (photo/chart/diagram) — One-sentence takeaway. Repeat. That creates predictable flow and reduces cognitive friction for your audience.
Do / Don’t Visual Checklist
| Do | Don’t | |
| Use a single clear takeaway per slide | Pack slides with paragraphs and multiple ideas |
| Use large, readable fonts and high-contrast colors | Use tiny text or low-contrast color combinations |
| Prefer simple charts with one message | Include dense tables that require long reading |
Example: a good slide shows a single bar chart labeled with the key insight and a one-line takeaway—no extra bullets. A bad slide dumps a multi-row spreadsheet on screen and asks the audience to parse it mid-speech.
Remember: visuals should increase audience attention to your ideas, not distract from them. Test your slides at the size and distance of the real room before you finalize.
Mastering the Art of Delivery and Body Language
Nonverbal signals shape how your message is received—especially when you communicate attitudes or emotions. Research on Mehrabian’s work shows the original finding applies to specific cases about feelings and should not be used as a blanket rule; focus on aligning your body, face, and voice with your message to maximize credibility.
Utilizing Gestures and Facial Expressions
Your gestures should support your words, not distract from them. Use open-palmed gestures to emphasize sincerity and count items with fingers to clarify lists. Avoid closed postures (crossed arms, hands in pockets) that signal defensiveness.
Keep facial expressions congruent with your content—an inviting smile or measured seriousness creates psychological safety and helps people pay attention.
Maintaining Confident Posture and Movement
Confidence begins before you step onstage. Practice a brief power pose privately to steady nerves, then adopt an upright posture with shoulders back and feet slightly angled. Move with purpose—short walks to different parts of the room create intimacy and reset attention.
| Effective Stance | Ineffective Position | Audience Perception | ||
| Angled body (one foot forward) | Direct frontal facing | Welcoming vs. confrontational |
| Open hand gestures | Crossed arms | Confident vs. defensive |
| Purposeful room movement | Static behind podium | Engaged vs. distant |
“The body says what words cannot.” — Martha Graham
Eye contact is your most powerful connection tool—sweep gaze across sections every 8–12 seconds so individuals feel noticed without staring. For large rooms, focus on groups rather than single seats.
Effective Use of Pauses and Verbal Cues
Pause deliberately. Strategic silence increases emphasis and gives listeners processing time; use a 2–3 second pause before and after key statements to create impact.

Avoiding Filler Words for a Smooth Flow
Filler words like “um” and “like” reduce perceived authority. Replace them with silence or a brief breath. Try a 5-minute daily exercise: read a short paragraph aloud and pause at commas and full stops to train intentional silence.
Practical Micro-Exercises
- 60-second eye-contact drill: practice sweeping gaze across four room zones while speaking a short 60-second summary.
- 5-minute filler-word practice: record a one-minute talk, count filler words, then repeat while aiming to cut them in half.
| Effective Technique | Ineffective Habit | Audience Impact | ||
| 2–3 second strategic pause | Filler words (“um,” “like”) | Projects confidence and control |
| Varied pacing with emphasis | Monotone delivery | Maintains engagement and interest |
| Transition pauses between sections | Rushing through content | Helps mental processing and retention |
When you lose your place, pause briefly instead of speaking filler—listeners interpret a short silence as intentional and composed. These adjustments to your delivery and body language consistently raise perceived confidence and clarity.
Rehearsal Techniques for a Flawless Presentation
Active rehearsal converts content into dependable delivery. Stand, speak aloud, and move through your slides—mental run-throughs alone won’t build the muscle memory you need under pressure.
Practical Rehearsal Progression (timed)
- Solo runs: 2–3 full timed rehearsals to fix pacing and core flow (record your best run).
- Video review: 1–2 focused sessions—record at 1080p and watch at 0.75x to spot micro-habits (filler words, posture, gestures).
- Peer run: 1 session with 2–4 trusted colleagues who give specific, actionable feedback.
- Venue run: 1 final timed run in the actual room (or a close simulation) to lock in spatial cues.
Schedule these four steps in your calendar at least 48 hours before the event to allow time for adjustments.
Recording and Self-Evaluation
Video reveals issues you miss in the moment. Look for filler words, repetitive gestures, and pacing problems. Log three specific fixes and drill them in isolation—repeat the opening, a transition, and a key data slide until they feel automatic.
Use the focused practice approach: isolate a 30–60 second segment, rehearse it 10 times, then reintegrate it into the full run. This builds automaticity without sounding memorized.
How to Rehearse: Quick Checklist
- Time each run and note sections that over- or under-run.
- Check camera framing and sound for virtual presentations; position light in front of you.
- Test slide transitions and embedded media during rehearsal—have local backups of video files.
- Practice gestures and movement with the actual clicker you’ll use.
- Record one run and count filler words; target a 50% reduction next session.
- Rehearse answering one likely question after the talk to smooth your Q&A.
- Print a one-line “jump back” cue for recovery if you lose your place.
Aligning Your Environment and Equipment
Arrive early and perform a 7-point tech check 60–30–15 minutes before your start time: mic, projector/display, slide clicker, video playback, internet, room lighting, and backup files. Photograph the room layout and mark where you’ll stand and walk so your movement feels intentional.
For virtual events, test internet stability and use a wired connection when possible. Confirm microphone levels and enable captions if available for accessibility.
Fact: context-dependent memory research indicates rehearsing in the actual environment can improve recall—when possible, do a final run in the real room (Godden & Baddeley overview).
CTA: Add the four rehearsal steps to your calendar now so you can complete them before your next presentation.
Handling Stage Fright and Building Confidence
Nervous energy is normal—how you channel it separates anxious speakers from confident communicators. Reframe your purpose: you are there to serve the audience, not to be judged, and that shift alone reduces performance pressure.
Techniques to Overcome Nerves
Before you walk on: follow this short pre-speech routine—sleep 7–9 hours in the 48 hours before, do 5 minutes of light movement, then a 5-minute breathing practice 10 minutes before your start time.
60-Second Breathing Script
Stand or sit comfortably. Inhale for 4 seconds through your nose, hold 1 second, exhale for 6 seconds through your mouth. Repeat 6 times. This diaphragmatic breathing activates relaxation circuits and increases oxygen flow to the brain (see Harvard Health breathing techniques).
Preparation Builds Confidence
Thorough preparation reduces legitimate uncertainty. Practice your one-line message and two opening sentences until they feel natural—having a 30-second script for the opening stabilizes nerves if short-term anxiety persists.
Quality rest matters: sleep supports memory consolidation, so avoid all-nighters in the 48 hours before your presentation (see NIH resources on sleep and memory).
Physical Fitness and Cognitive Framing
Short-term fitness habits—light cardio or breathing exercises—help with breath control and reduce cortisol. Reframe anxious thoughts into energized ones: replace “I’m so nervous” with “I’m excited” and “What if I fail?” with “What value am I bringing?” Practice this reframe once a day for three days before the event.
Quick Action Items
- 48-hour checklist: 7–9 hrs sleep, light exercise, hydrate, review your one-line message.
- 10 minutes before: breathing script (above) + 30-second opening aloud.
- Day-of: warm up voice for 3 minutes and do a 60-second eye-contact drill.
Be honest: some nervousness may remain despite preparation—plan your recovery (the short opening script) and focus on the audience’s needs to convert nerves into productive energy.
Leveraging Technology for Dynamic Presentations
Technology should be an invisible partner that amplifies your message—not a source of distraction. Test and simplify: the fewer moving parts that can fail, the more confidently you can lead the room.
Utilizing Multimedia Tools
Use multimedia selectively. Short video clips (under ~90 seconds) work well for demos or testimonials because motion clarifies process; longer videos risk losing attention. Prefer live whiteboard sketches for problem-solving moments and single strong images to punctuate emotional or strategic points.
Tool notes: Visme and Canva are useful for quick visuals and brand-consistent slides; Webex and similar platforms provide built-in polling and Q&A for virtual interaction (link to vendor guidance when publishing).
Ensuring Smooth Technical Execution
Run a timed tech checklist at 60–45–15 minutes before start: confirm projector/display, test mic and speakers, check slide sequencing, play embedded videos locally, verify internet, and have backups (PDF slides, local video files, extra cables).
For virtual presentations, use a wired connection when possible, test webcam framing, and confirm microphone levels. Add captions or provide a transcript to increase accessibility and retention for remote attendees.
Plan B: When Technology Fails
If video or audio fails, continue the narrative verbally: narrate screenshots or switch to a live demo or whiteboard. Have a printed one-page summary or a PDF you can email immediately so participants still leave with the key ideas.
Recruit support when possible—an assistant can advance slides, monitor chat, and handle tech fixes so you stay focused on delivery and audience connection.
Quick checklist (15 items): display on/off, projector lamp, input source, laptop power, slide file open, local video file check, clicker battery, mic level, speaker check, internet, webcam framing, lighting, backup cable, backup slide PDF, captions enabled.
Conclusion
Presentation skill improves with deliberate practice, not luck—pick one focused habit and work it consistently for two weeks. Prioritize structure, practice, or visuals as your single area of focus this month and measure one simple outcome (for example: ask attendees one follow-up question about clarity within 48 hours).
Recommendation: start with the structure habit—write a one-line message, build three supporting points around it, and rehearse the opening until it feels natural.
Mastery requires small, repeatable steps: schedule short practice sessions, solicit honest feedback, and iterate based on results.