Many creators buy expensive gear hoping it will fix poor-looking footage, but the real issue is often basic lighting and setup. Fixing those fundamentals can dramatically improve viewer perception and retention without a huge spend.
Poor production quality reduces perceived credibility and lowers engagement; for example, YouTube’s Creator Academy notes that presentation quality influences watch time and audience trust (source: YouTube Creator Academy).
This guide gives actionable, budget-conscious steps to get great lighting and cleaner video results. Follow one simple setup, test it, and iterate — you can get professional-looking results without professional prices.
We focus on core principles: how a key light, fill, and backlight interact; how color temperature affects skin tones; and which affordable equipment choices give the best return on investment. Apply these steps, and your audience will notice the difference in how your subject and background resolve on camera.
You don’t need a film degree or a $5,000 rig—start with what you have, learn systematic setup routines, and upgrade only when a real need appears.
Pick one setup below and test it this week — use your phone or camera, record two short clips (window light vs. a single LED source), and compare which preserves color and reduces harsh shadows.
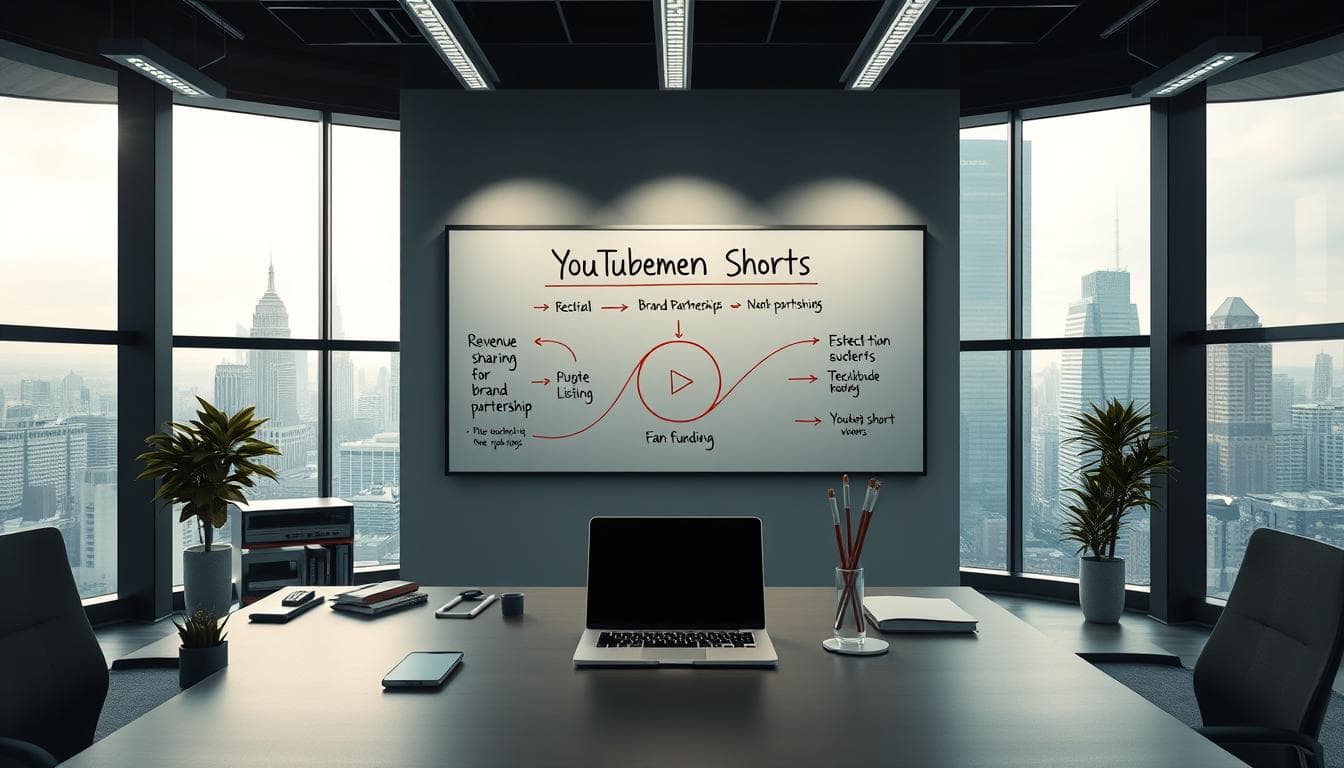
Introduction to Budget-Friendly Studio Lighting
High-quality visual results don’t require expensive gear—good lighting and repeatable technique do. You can achieve usable, *studio*-level video with nothing more than smart use of natural light and affordable LED kits under $200.
Natural window illumination is a powerful free source; photographers note that diffused daylight produces soft, flattering light similar to a large softbox (source: Cambridge in Colour). The tradeoff is scheduling—use windows when the sun angle and cloud cover give consistent, soft light.
Entry-level kits are useful when you need schedule flexibility. For example, a basic three-light continuous kit gives you control over key, fill, and backlight without a large investment; look for units with adjustable stands and dimmable LEDs. Treat brand examples as options rather than mandates—check reviews and return policies before buying.
If you publish frequently (2+ videos per week) consider mid-tier gear for reliability and faster setup; casual creators who post occasionally can often get the best results by learning how to use window light and a single LED or ring light. Professional teams who need creative color control and barn doors may justify the $600–$800 range for advanced RGB panels.
Start with what you can afford: run a quick window test this week—record two short clips (window-only vs. single LED) and compare which preserves skin tones and reduces harsh shadows. That simple A/B will show you the biggest, cheapest gains in video lighting.
The Importance of Lighting in Video Production
Professional production starts with understanding how light interacts with your camera. Many creators prioritize script and delivery but overlook technical execution—lighting mistakes can make well-written videos look amateur and cost you viewers.
Impact on Video Quality
Cameras capture light differently than human eyes: sensors have more limited dynamic range and respond to color temperature literally. For example, a camera’s limited dynamic range makes blown highlights and crushed shadows more likely without proper lighting control (source: Cambridge in Colour).
Patterns across creator channels show clearer visuals correlate with higher perceived professionalism; improving illumination often yields a measurable lift in watch time and engagement (see YouTube Creator Academy guidance on presentation and watch time).
“Content quality cannot compensate for technical deficiencies—viewers judge production value within seconds.”
Enhancing Viewer Engagement
Proper lighting reduces distracting shadows and improves subject clarity, which helps keep attention on the message. Well-lit videos make faces and backgrounds easier to read, improving retention metrics noted in creator guidance.
Superior production quality often translates to longer average view durations and better conversion rates; invest in consistent lighting to maximize returns across your video library.
| Lighting Scenario | Typical Viewer Retention | Perceived Expertise| Content Impact | |||
| Professional Illumination | Higher relative retention | Expert Level | Maximum Value |
| Average Conditions | Moderate retention | Intermediate | Moderate Value |
| Poor Execution | Lower retention | Amateur | Minimal Impact |
Subject separation, controlled background lighting, and minimized harsh shadows determine where viewers look. Focus on repeatable lighting setups so each recording session produces reliable, watchable results.
Understanding Lighting Basics for Video
The difference between human vision and camera perception is the single biggest reason amateur shoots look inconsistent. Cameras have technical limits—dynamic range and color response—that require intentional lighting and camera settings to manage.
How Cameras Perceive Light
Camera sensors operate within fixed parameters (ISO, aperture, shutter speed) and can’t adapt the way human eyes do; this means a scene that looks “bright enough” to you can appear dim or flat on camera. For reference, many consumer sensors have a dynamic range far narrower than the human eye (source: Cambridge in Colour).
Because of that, you often need more controlled illumination: increase light intensity or use larger, softer sources so the camera can expose without pushing ISO too high. Practical example: for an APS-C or full-frame camera shooting indoor talking-heads, start around ISO 200–400, aperture f/4–f/5.6, and 1/50–1/100s shutter (match shutter to 2x frame rate) and adjust light output to place skin tones mid-range on your histogram.
Color rendering is another core challenge. Cameras record color temperature literally—LED panels, tungsten bulbs, and daylight all carry different color casts. Daylight is typically around 5600K; tungsten is around 3200K. Mixing those sources creates color casts that white balance can’t always fix (source: B&H Photo reference on color temperature).
The contrast range cameras capture is narrower than human vision. That means highlights can clip and shadows can block up much faster than your eye expects. Use diffusion, reflectors, or a fill light to keep detail in both highlights and shadows.
Always test your setup through the camera viewfinder or monitor—not by eye. A quick three-step camera test: 1) set camera exposure and white balance using a gray card, 2) review waveform or histogram for clipped highlights/shadows, 3) adjust light positions or intensity until the subject’s face reads mid-tones. Testing this way eliminates guesswork and shortens setup time.
Choosing the Right Lighting Equipment
Picking the right lighting equipment is one of the smartest investments you can make for better video. Your choices set the ceiling for visual quality and affect setup time, portability, and long-term cost of ownership.
Affordable Lighting Options
LED-based systems are the practical default: they run cool, draw less power, and offer dimming or bi-color options that help match color temperature. Entry-level three-light continuous kits (look for dimmable LEDs and adjustable stands) give you control over key, fill, and backlight without a big outlay—many beginner kits retail in the low double-digit to low triple-digit range depending on build and features; always check current manufacturer listings and reviews before purchase.

Mid-tier kits add build quality and features (boom arms for overhead/backlight, better color fidelity). High-end RGB panels give creative color control and barn doors but cost more and may be overkill for many solo creators—evaluate whether the extra features will be used regularly before upgrading.
Pros and Cons (short)
- Basic LED kits — Pros: inexpensive, simple; Cons: cheaper modifiers, limited color control.
- Ring lights — Pros: flattering, shadow-free for close-ups; Cons: flat look, limited dimensionality.
- Mid-tier panels — Pros: better fidelity and build; Cons: higher cost and slightly more setup complexity.
DIY Solutions for Budget Setups
DIY tools can be surprisingly effective. White bed sheets or shower curtains stretched over a frame make inexpensive diffusion panels; foam core or aluminum-foil reflectors add fill light. These tactics teach you how light quality and direction work before you invest in dedicated equipment.
Ring lights merit consideration for solo creators who primarily shoot direct-to-camera beauty or product close-ups, but expect less depth than a three-point setup.
Budget Progression and When to Upgrade
Start with free natural sources, then add simple equipment as your needs and publishing frequency grow. A practical progression: window light → single ring or panel ($30–60) → two-light setup ($80–120) → full three-point kit ($150–200+) for consistent three-light setups. If you publish 2+ videos weekly, mid-tier panels save time and provide consistent results.
When evaluating kits, check CRI/TLCI ratings for color accuracy, dimming range for control, and whether the stand and mounts meet your space needs. Read reviews focused on real-world use—some low-cost kits have flimsy stands or unreliable dimming controls.
Technique consistently outperforms equipment. Practice placing a key, fill, and backlight and document a repeatable setup; that will improve your lighting more than chasing the next expensive light.
Starter Kit Checklist
- One adjustable LED panel or ring light with dimming and bi-color (if possible).
- A reflector (foam core or silver/white board) for fill.
- Light stands with secure mounts and basic diffusion (softbox or DIY diffuser).
Setting Up Your Filming Space
Your filming environment influences focus and perceived production value as much as your camera or lighting. Treat the space as a controlled set: every visible element should support the message or be removed.
Small visual distractions pull attention away from the subject; cleaning and deliberate styling help viewers concentrate on your content.
Decluttering and Cleaning Tips
Remove unnecessary objects before recording and take a quick reference photo so you can restore the setup later. Dust, smudges, and fingerprints show up on camera more than they do in person—clean visible surfaces and camera lenses before each session (source: photography studio hygiene guides).
Use a minimal set of props that serve clear purposes: 1) one personal item to suggest authenticity (book, small plant), 2) one practical prop related to the topic (product, tool), 3) one neutral decorative accent for color (pillow or lamp). Ensure you have rights to display any branded items or artwork.
Optimizing Your Background
Create depth by positioning your subject away from the background—about 50cm (rough guideline) reduces background sharpness and helps your subject separate visually. Cinematography resources note that increased subject-background distance aids perceived three-dimensionality (source: basic cinematography guides).
Background micro-examples: Minimal Neutral — plain wall with soft light for tutorials; Styled Shelves — a few curated items for interviews; Textured Environment — fabric or acoustic panels for creative shows. Keep color palettes muted to avoid clashing with skin tones and on-camera color temperature.
Background Light and Separation
Use a small background light to create separation and prevent the background from falling into flat darkness. A low-power LED or a small RGB panel aimed at the background adds visual interest without overpowering the subject.
Managing Reflections and Mirrors
Mirrors and glossy surfaces create unwanted reflections of lights and gear. Avoid filming directly facing reflective surfaces whenever possible; temporarily cover mirrors or reposition lights to prevent hard specular highlights.
Control your light sources so reflections don’t create hotspots—soft diffusion and tighter beam control (barn doors or grids) help keep reflections manageable. Create repeatable setups with marked positions for camera, subject, and lights so you can reproduce quality across recordings.
Exploring Different Lighting Types
The right combination of key, fill, backlight, and—when appropriate—a ring light determines whether your footage reads *amateur* or *broadcast-ready*. Below are the practical roles of each light and how to apply them on a budget.

Key Light, Fill Light, and Backlight
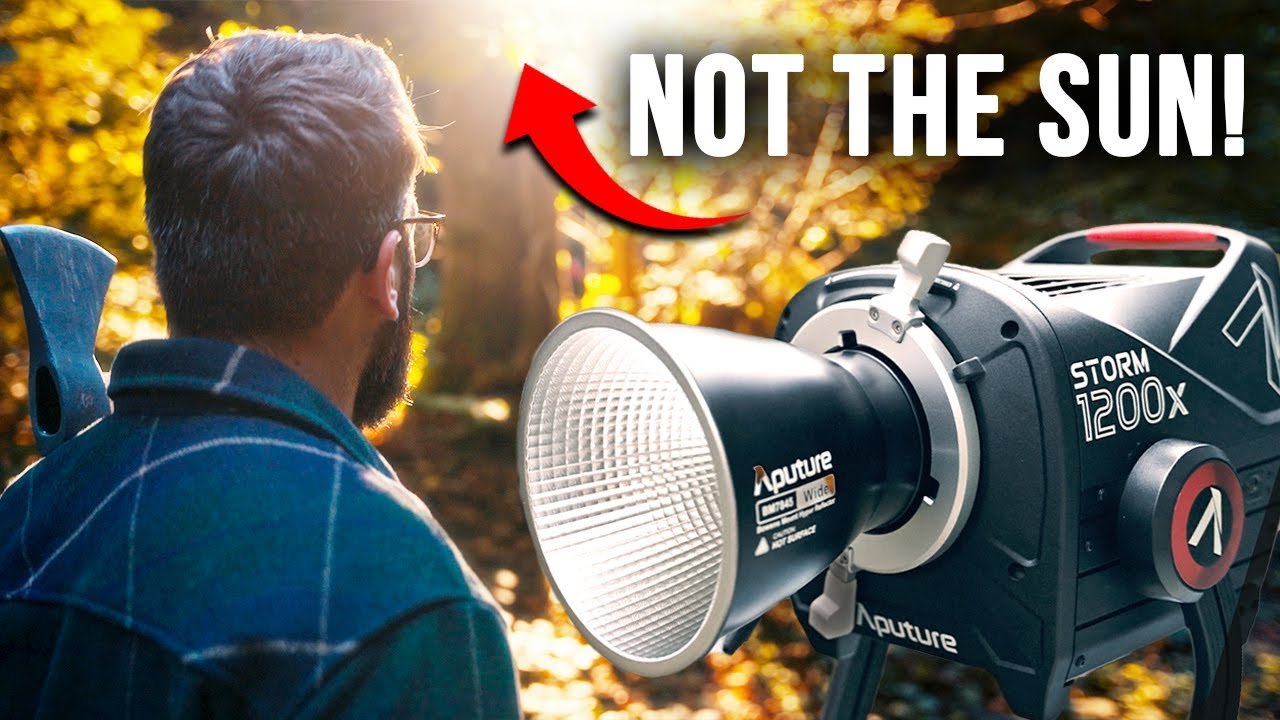
Your key light is the primary source that shapes the subject—place it roughly at a 45° angle to the camera to create natural modeling and controlled shadows (source: basic cinematography guides). The fill light sits opposite the key at lower intensity to soften those shadows without removing depth. A backlight behind and slightly above the subject adds rim separation so the subject stands out from the background.
| Light Type | Primary Function | Ideal Position | Creative Impact | |||
| Key Light | Primary illumination | 45° from camera | Defines mood and depth |
| Fill Light | Shadow reduction | Opposite key light | Controls contrast ratio |
| Backlight | Subject separation | Behind subject, high | Adds dimensionality |
Ring Light Benefits
Ring lights give even, flattering illumination and built-in camera mounts, which is why they’re popular for close-ups and beauty videos. They create distinctive circular catchlights in the eyes, but the drawback is a flatter look—ring lights reduce shadows that create depth, so they’re not the best choice if you want dimensionality in your frame.
“Ring lights excel for direct-address content but limit creative dimensionality compared to three-point setups.”
Implementing Three-Point and Alternative Lighting Schemes
How you place your lights matters more than how many you own. The classic three-point arrangement remains the most versatile approach for single presenters.
Three-Point Lighting Setup
Picture a clock: camera at 6 o’clock, key at 4 o’clock, fill at 8 o’clock, and a backlight between 1–2 o’clock. This layout creates balanced modeling, controlled contrast, and subject separation. For many solo creators, the clear winner is three-point lighting—it delivers the most professional-looking results for talking-head and tutorial formats.
Two-Light, Four-Light, and Loop Techniques
Two-light setups (key + backlight or key + fill) are winners for mobility and small spaces—useful when subjects move or you need a quick pack-and-go rig. Four-light setups add a dedicated background light for creative control over depth and color. Loop lighting is a minimal portrait technique that uses a single key slightly above eye level to create a small shadow under the nose for classic flattering results.
Troubleshooting Common Issues
- Harsh shadows: soften key with diffusion or move it farther and increase output.
- Flat faces: reduce fill intensity or move fill further from camera axis.
- Poor separation: raise backlight height or increase its power slightly to create a rim highlight.
Acknowledge trade-offs: three lights need more space and setup time, two lights may lack background separation, and ring lights give flattering close-ups but little depth. Match your scheme to content, space, and publishing frequency—three-point for static presenters, two-light for run-and-gun work, ring for tight beauty/product shots.
Expert Tips for Using Natural and Artificial Light
Smart creators pick between free and controlled light sources based on schedule and desired look—use natural light when it works, and keep artificial lights ready for reliability and consistency.

Using Natural Light Smartly
Natural light is the best lighting you can get for free—diffused daylight produces soft, flattering results similar to a large softbox (source: Cambridge in Colour). Golden hour (shortly after sunrise and before sunset) gives warm, low-angle light that flatters faces, but it restricts when you can record.
Overcast skies act like a giant softbox by diffusing sunlight; photographers note that even cloud cover produces softer shadows and more even color (practical guideline: aim for evenly lit windows and avoid direct midday sun). Use neutral density filters to reduce brightness without changing aperture or shutter—many photographers recommend 1–3 stops of ND for bright windows, depending on conditions (source: B&H Photo).
Quick golden-hour test (3 steps): 1) visit your shooting spot at the intended time, 2) place your subject where the softest light falls, 3) record a 30-second test clip and check skin tones and shadow detail on camera.
When to Rely on Artificial Light
Artificial lights give you control over intensity, direction, and color temperature so you can record on a schedule. Keep a minimal kit (one adjustable LED panel as a key, one small fill or reflector, and an optional backlight) as a fallback when natural conditions change.
Bi-color panels let you match color temperatures between 3200K and 5600K to avoid mixed casts; this flexibility is valuable if you sometimes shoot with window light and sometimes without. Test with a white card and set custom white balance when mixing sources.
Your equipment should serve your content calendar, not dictate it. Use natural light for polished, low-cost results when possible and switch to artificial setups for consistent daily or weekly recording schedules.
Weaknesses to acknowledge: natural light is weather-dependent and may force tighter schedules; cheap LEDs can have poor color fidelity or flicker at certain camera settings—check CRI/TLCI ratings and test before committing to a kit.
Optimizing Color Temperature and Reducing Glare
Two technical details that betray amateur footage are inconsistent color temperatures and unmanaged reflections. Controlling these elements makes skin tones look natural and keeps viewer attention on the subject rather than on distracting highlights.
Systematic control of color and glare helps your camera reproduce accurate colors and retain shadow detail across shots.
Achieving Consistent Color Temperature
Color temperature, measured in Kelvin, determines whether your footage looks warm (around 3200K) or cool (around 5600K). Daylight-balanced sources (~5600K) are a versatile starting point for mixed indoor/outdoor work (source: B&H Photo video basics).
Bi-color LED units offer maximum flexibility by letting you dial temperature to match windows or tungsten fixtures—this avoids the orange/blue conflicts that no simple white-balance tweak can fully fix. A practical tip: use a white card or a basic color meter to set a custom white balance before recording (source: camera manufacturer guides).
Affordable bi-color panels commonly start around $60–$150 depending on size and CRI/TLCI ratings; check product specs for CRI 90+ if accurate skin tones matter to you.
Techniques to Fix Glare
Glare on glasses or shiny skin pulls focus from the eyes. The fastest fix is positioning: raise key and fill lights above eye level and angle them down so reflections miss the lens.
Other options: move lights further off-axis to change reflection angles, add diffusion to soften hotspots, or use a polarizing filter on lenses when appropriate (polarizers reduce surface reflections—source: photography lighting references). Asking talent to remove glasses should be a last resort and handled sensitively for accessibility reasons.
Quick Glare Troubleshooting
| Problem | Fix | Trade-off | ||
| Glare on glasses | Raise lights above eye line / move off-axis | May change shadow shape |
| Hot facial highlights | Use diffusion or lower intensity | Softer look, less contrast |
| Mixed color casts | Use bi-color LEDs or set custom white balance | Requires testing and meter/white card |
Consistent temperature and controlled reflections make your subject and background read correctly on camera and help your videos look more professional with minimal equipment.
Conclusion
Recommendation: start with a quick window test, then move to a compact two-light LED kit for dependable results, and scale to a three-point setup once you publish regularly.
Prioritize learning repeatable setups over chasing gear. Practice placing lights to control shadows and color temperature, and your videos will look noticeably more professional without a big budget.
Make one change this week—test lighting, record, compare—and iterate from there.